
Enhancing Your Qodly Pet Contest App with CSS
Welcome back to our pet contest app journey!
In the previous post, we built the core functionality of our application using Qodly’s powerful low-code tools. Now, it’s time to make it visually appealing with CSS!
Best part? We won’t use a single line of CSS code! Everything will be configured directly from Qodly’s Property List, making styling effortless—even if you have no prior experience with CSS.
In this post, we’ll explore how to customize colors, fonts, and spacing and add stylish buttons and pet cards.
Let’s get started!
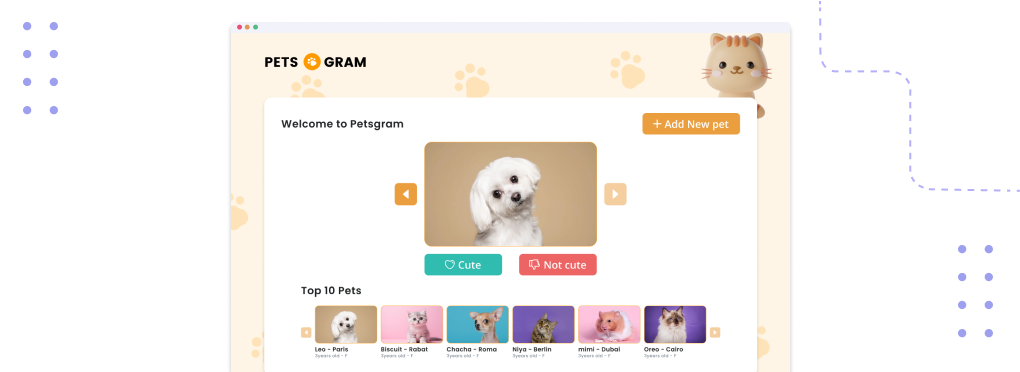
This is the mockup I received from our designer, so let’s try to make it as close as possible using Qodly’s built-in styling tools.
Customizing the Overall Look
Adding a Background Image
A great background sets the mood for our app. Here’s how to add one:
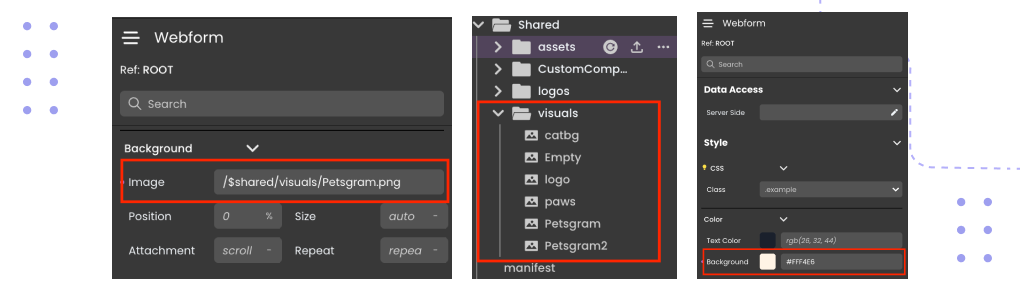
- Drag and drop a background image of your choice (in my case, the one with cute cat paws) into your Shared → visual folder:
- Open the Background section in the Property List.
- Under Background → Image,
- Drop the image from your visuals folder into the webform, and voilà—the background is set! 🐾
Using a Solid Color Instead
If you prefer a clean look, you can use a light beige color instead:
- In the Property List, find Color -> Background.
- Set the color to #FFF4E6 (light beige).
Either option instantly transforms your app's feel, making it warm and inviting!
Styling the Voting Section
Enhancing the Random Pet Display
To ensure the pet images look great:
- Select the image component.
- In the Property List, apply:
- Border Radius: 50px (for round images)
- Display: Flex
- Justify Content & Align Items: Center
This makes each pet image look clean and perfectly centered!
Enhancing the Voting Buttons
Let’s make the "Cute" and "Not Cute" buttons stand out:
- Select the button component and go to the Property List.
- Adjust the Background Color to Light Carmine Pink (#E85D66) for "Not Cute" and Keppel (#41B6A6) to "Cute" .
- Set the Text Color to White (#FFFFFF).
- Increase the Border Radius to 6px for rounded edges.
- Feel free to adjust the height and width as well.
- 💡 Want icons? Add a read heart ♥️ and thumbs-down 👎 to make them even more engaging!

Refining the Pet Matrix
Before, the pet matrix looked cluttered, with overlapping entries. Here’s how to fix it:
- In the Property List, set the height of the matrix to 400px.
- Use Flexbox. Justify Content & Align Items: Center
- Apply a Border Radius of 50px for a cute, rounded effect for the images.
Now, our pet list looks clean and well-organized!
Styling the Add Pet Section
Enhancing the Add Pet Button
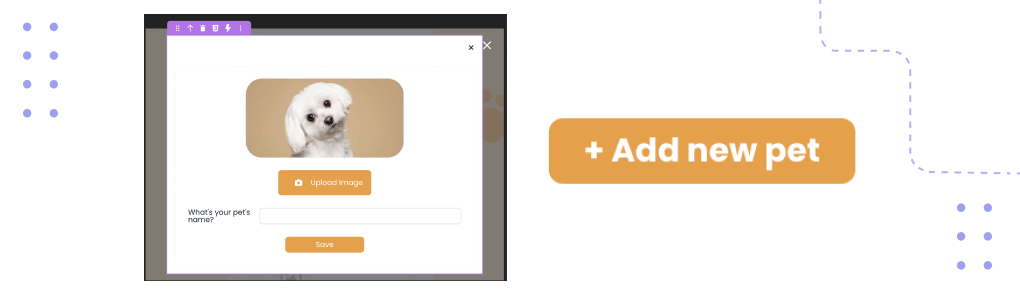
Make the "Add New Pet" button visually appealing:
- Select the button in the webform.
- In the Property List, set:
- Background Color: Indian Yellow (#E5A04B)
- Text Color: White (#FFFFFF)
- Font Size: 14px,
- Bold Border Radius: 6px
- Add a plus (+) icon, position it to the left, and set the color to #FFFFFF.
- Adjust the Padding for a balanced layout.
Perfecting the Modal
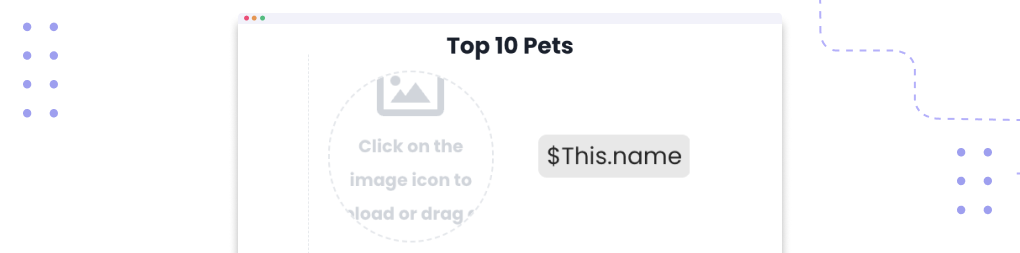
- Set a Default Pet Image
- Select the image component.
- Follow the steps in the section Adding a Background Image to add a default image. This can provide a visual cue to users about what kind of image they should upload.
- Center the modal
- In the Layout section, set Alignment to Center.
- Adjust Margins & Padding for proper spacing.
- Style the Upload Button
- Select the Upload Image component.
- Choose a camera icon 📷 from the Icon Picker.
- Set the Button Color to #E5A04B (to match the "Add Pet" button).
- Refine Input Field
- Add a light border and 6px rounded corners.
- Adjust the font size for readability.
- Customize the Save Button
- Background Color: #E5A04B
- Text Color: #FFFFFF
- Adjust padding for a well-proportioned look.
Bringing It All Together
With just a few tweaks in the Property List, we transformed our app from screen 1 to 2:
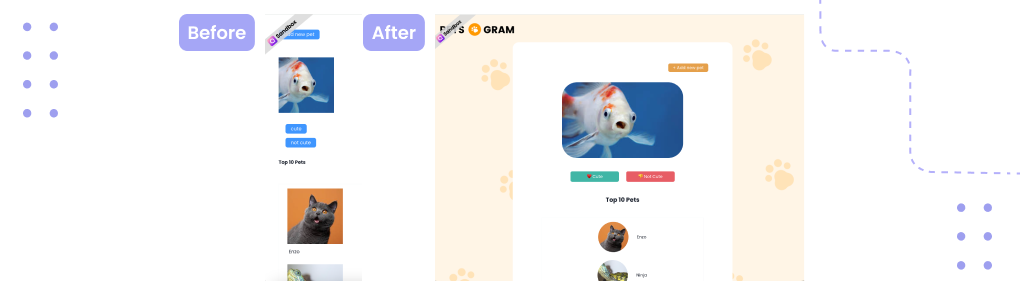
And we did it all without writing a single line of CSS—just using Qodly’s built-in styling tools!
Feel free to play around with different styles! If you have questions or styling ideas, connect with us on the Qodly Forums! 🚀
Hybrid Low-code Platform For Your Business Apps
Have freedom of customization while avoiding the constraints of No-Code limitations. Try Qodly for Free!
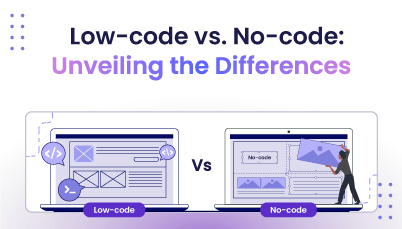
Low-code vs. No-code: Unveiling the Key Differences
In software development's changing landscape, two words have become increasingly important in recent...
Build Your Trello Clone in Minutes! (Video Tutorial Included)
Throughout my career, I've tried various project management apps, but I often found them lacking in ...
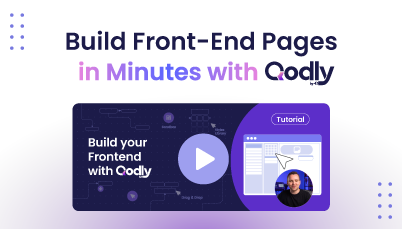
Build Beautiful Front-End Pages in Minutes with Qodly
In web development, having a unified tool that bridges the gap between designers, clients, and devel...
Formula vs. Development Platforms: Choosing the Right Tool for Your Needs
Choosing the right platform to build your software can be overwhelming. Two popular options are form...
When Low-Code/No-Code Development Works (and When It Doesn't)
For years, businesses have been stuck between two extremes when needing new software: custom develop...
Exploring Qodly Custom Components
Qodly introduces the concept of Custom Components, empowering developers to extend the platform's ca...

Announcing the Qodly HackDev24 – Code for Gold!
Calling all developers, sports fans, and creative minds! Are you passionate about the sport and exci...

Is Qodly Suitable for Citizen Developers?
In today's fast-paced business world, the demand for custom applications is higher than ever before....
Let's celebrate together Qodly's first Hackathon: DevHack24!
Who was the hackathon aimed at, and what was the theme?The very first Qodly Hackathon on the sports ...
Key Features to Look for in a Low-Code Platform
As businesses strive to keep up with rapidly evolving technology demands, low-code platforms have em...
How to Build a Custom Application
Businesses often use custom apps specifically designed to automate workflows or enhance customer exp...

How Low-Code Platforms are Empowering Small and Medium-Sized Businesses
Nowadays, businesses of all sizes rely heavily on mobile apps to facilitate client communication, op...